


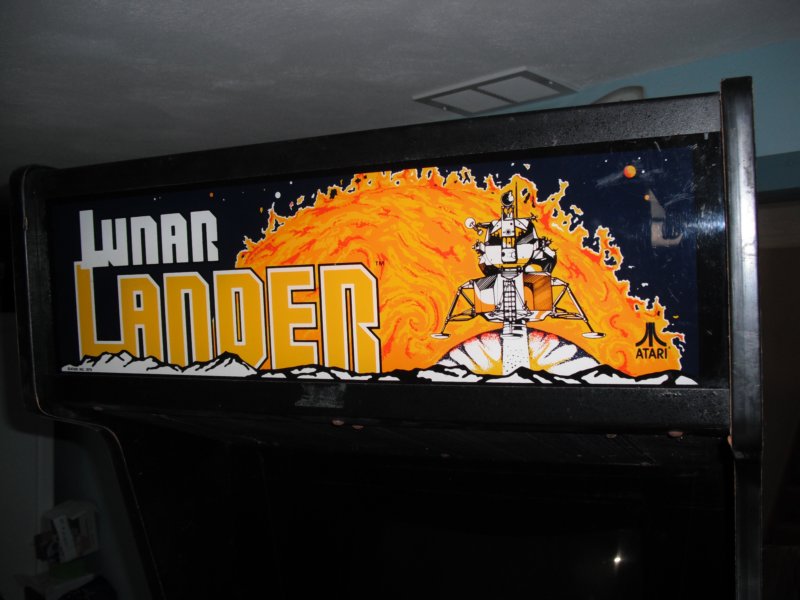
Steve(aka SRW@KLOV) dropped off this game and Kawydud's Star Wars this past Saturday at Vidiot for a Day.
It was an absolute sight to behold having those two games in the back of his new game hauler van. He also had a Asteroids Deluxe cabaret back there so there was much vector love going on!


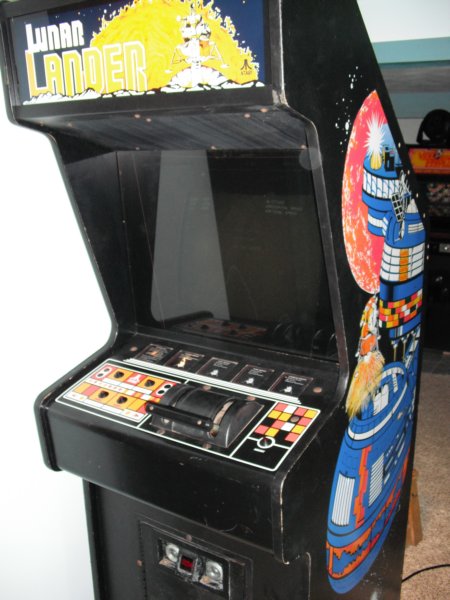
First thing I noted is that Lunar Lander is heavy! I've moved my share of Atari games but for some reason this thing kicked my butt. On top of heavy, it's very tall when you tip it back so I kept having to "go down" with it... which made it even heavier!
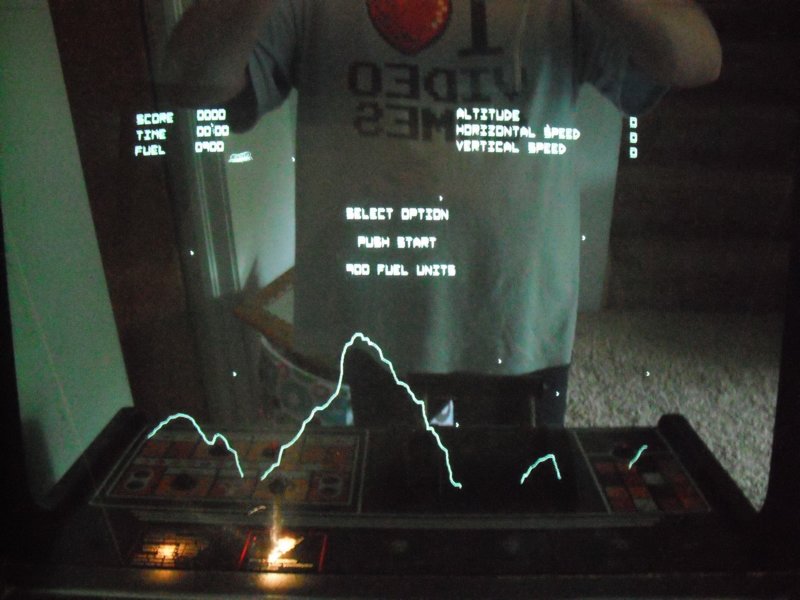
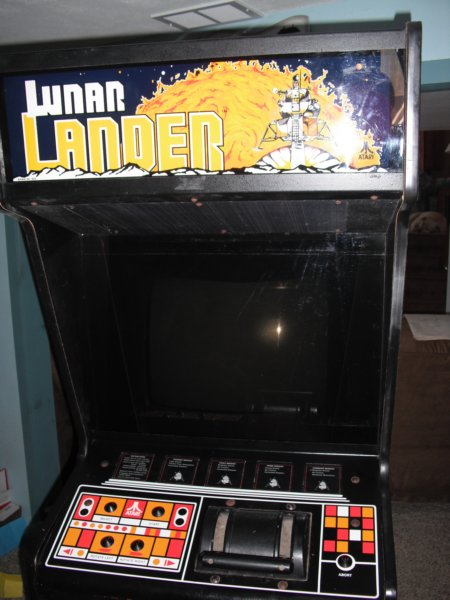
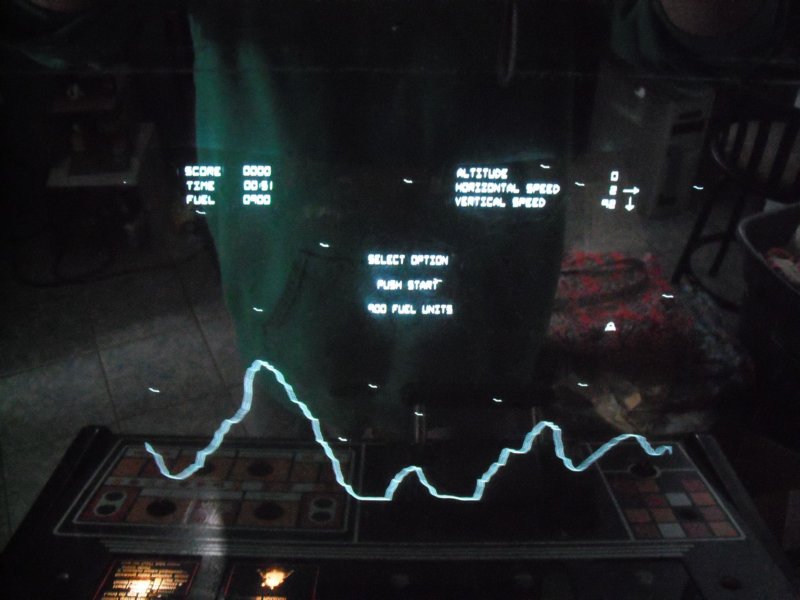
After getting it into the house and powering it up we were greeted with... Lunar Lander!!! I swear to God I had a tear in the corner of my eye when I saw this thing. Not sure why this and Red Baron affect me so much... but they do.
The joy and happiness was short lived. About a minute into the first game it reset. Then about 30 seconds into the next game... it reset. I seriously almost ran by/around/through/over everyone at the party and jumped into the pool. I just wanted to hold my head under the water in some weird show of defiance... there was no way my new LL was acting this way... no way!
Instead I just unplugged it and grabbed a beer(or two maybe).
Monday was the first day I could look at it so look I did. On Saturday I noticed the edge connector of the PCB was fried a bit. Looking at it closer now it was really fried. I spent some time cutting a piece of ground plane from a POS Tempest PCB I use for parts(looks like it was pissed on and then corroded wherever there was pee). After cutting it down to the width of the edge connector trace I soldered on two new pieces.
I also had to remove solder from every edge connector since someone thought that was the way to get a better connection to the harness. And by doing that, they spread out most of the pins in the harness so I had to replace a handful of those too.
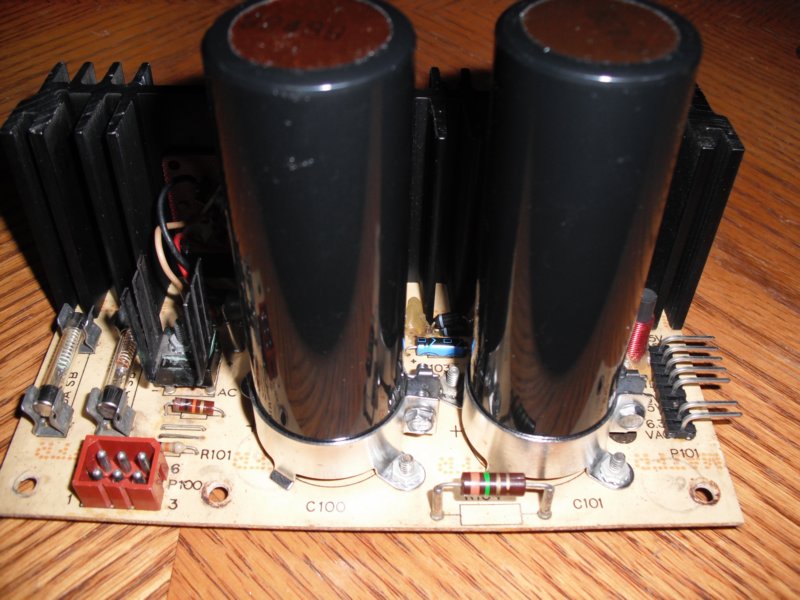
Then I moved onto the power supply. Come to find out a 1N4001 diode in the sense circuit fried and popped right off the supply. The PCB was pretty burned in this area so the new diode needed some creative soldering.
While the power supply was out, I did a cap-kit on it and touched up all the questionable solder. I also replaced Big Blue with Big Black and cleaned up the brick a bit. Then I noticed that five of the six fuses were the WRONG value so I fixed that too.
With the two major items taken care of(edge connector and power supply) I put everything back together and was greeted with nothing. Looking at the CPU, it was watch dogging. Now knowing Battlezone and Red Baron do this with ROM problems I started reseating ROMs. This board has 16 bipolor PROMs and two EPROMs so there were plenty to reseat.
Tried it again, and nothing. Looked at the CPU and again, it was barking.
Figured I'd try another CPU and again, that one was barking... but it was barking a little different.
Next I started measuring continuity with the PROMs and right off the bat I found a bad socket. Then in a couple more minutes I found another. Ugh.
I replaced those since everything else seemed good and again... nothing on the screen but now I was getting a LOOOOooooonnnnng beep and no watch dog pulse?!?! Hmmmm...
Took the board out again figured out that another socket was bad for the PROMs. Good God man... there has to be a better way here!
Luckily there is. AndysArcade.de had the ROM images and noted that boards with 16 bipolar PROMs can be switched to 4 EPROMs if the EPROM sockets are there... which mine were.
Got some spare EPROMs and burned new images. Also checked the two vector ROMs while I had the old Needhams PB-10 out and they were good.
Removed the 16 little bastards... put in the 4 big bastards... crossed my fingers... and... and... and... BBBBBBeeeeeeeeeeeeeeeeeeeppppppppp Same crap. Ugh!!!
After taking a long break I came back and looked at the CPU. It was now quickly barking... really odd... Hmmmmm... could my replacement CPU be bad?
Scavenged another 6502 and popped it in and wouldn't you know it... I had a Lunar Lander screen on the o'scope(I disconnected the monitor a while back since it was just going into spot killer).
Yeah!!! Lunar Lander is alive(again)!!!
Removed the scope, connected the monitor, went around the front of the game to play, and... and... and... only a half screen on the display!!! UGH!!!
Reconnected the scope and the picture was fine there so the monitor was now suspect. UGH!!!
Please... please... PLEASE let it be cold solder joints... PLEASE?!?!
And yep, there were.
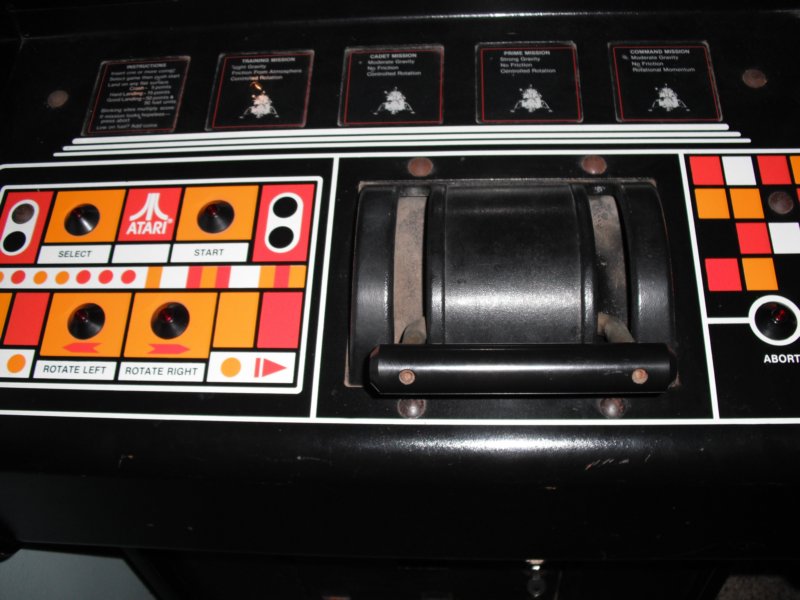
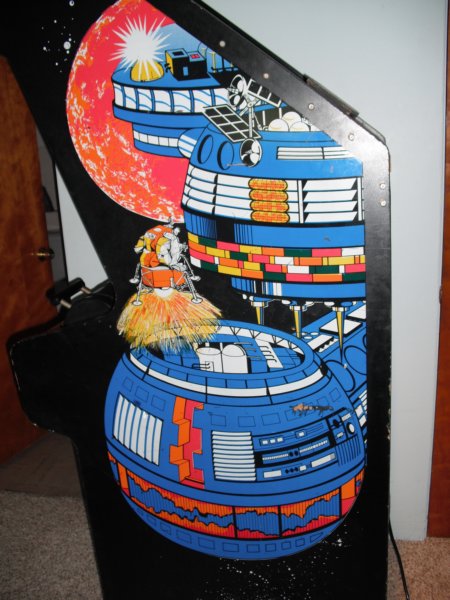
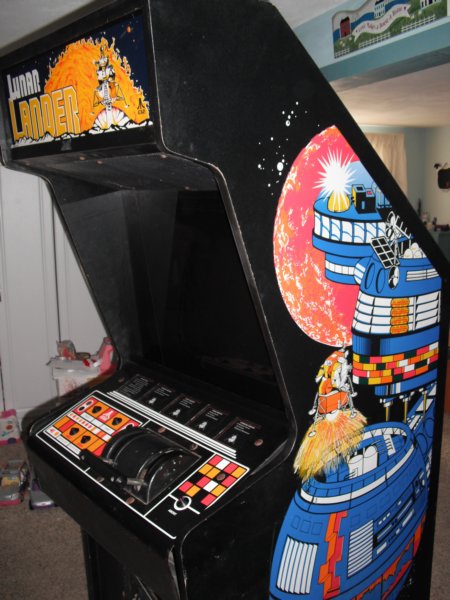
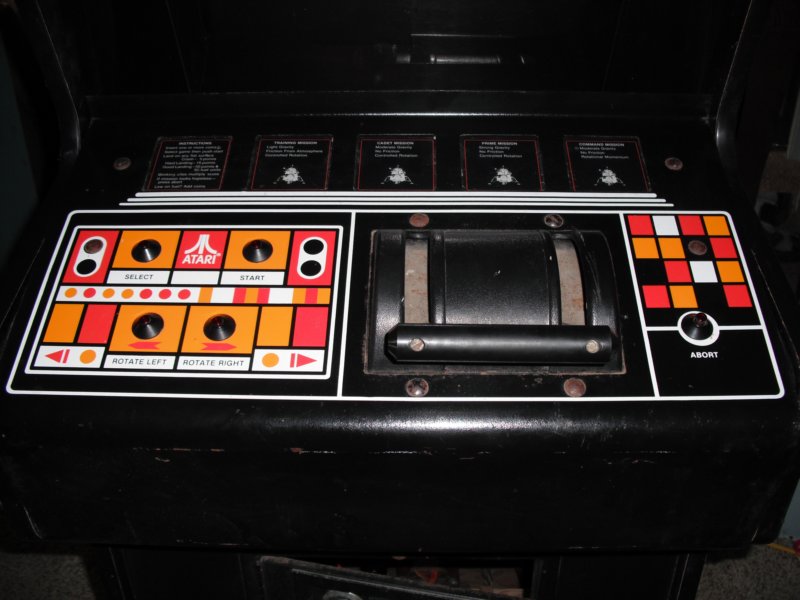
I still have to do a cap-kit on the monitor(have to order one). And the cabinet can use some TLC in places. But the control panel is very minty... and the sideart is in great shape too!
I've played about 10 games so far and I have found myself with that tear again a couple times. This game is truly a classic and will look great beside Red Baron and Battlezone. Atari hit it out of the part with these games and honestly... I can't believe I own them. Thanks again Steve!!!
There are more pictures HERE.
Mr. Tim from Fayetteville, NY delivered this wonderful game this past Sunday(03/17/2013).
It is in really decent condition considering it's age but it was only semi-working when delivered.
I've been working on the game this week and after a little bit of luck I narrowed the graphical problem down to the 74LS191 at D9. There was also a throttle issue and that was traced down to another 74LS191 at D10.
There are still a few things to take care of but I'm in no hurry. I'll be sure to update this page whenever I work the game, but for now I'll just play!
Click HERE for some more pictures.
Looking closer at that circuit I noticed the voltage coming from the 5k variable resistor in the thruster was jumpy. I replaced the VR and I'm hoping that will take care of the 74LS191 chips at P9 and P10 blowing. All I can do now is play and keep an eye on them.
Basically I cleaned everything up real nice, replaced all the capacitors and most of the variable resistors, and then fixed a couple of ugly previous fixes.
Oh, and I also modified a spare G05-802 HV shield I had here for use with the smaller G05-801 HV cage.
For loads more pictures, click HERE. Enjoy!
(AS OF: 04-21-2013)
- MACHINE #1
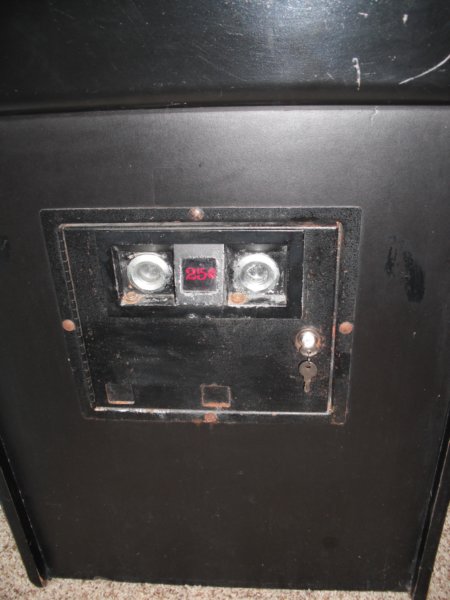
- Replaced door locks
- Repaired and installed cap-kit in power supply
- Repaired edge traces on PCB
- Repaired edge connector pins
- Replaced defective 6502 CPU
- Repaced 16 bipolor PROMs with 4 EPROMs
- Repaired cold solder joints on monitor PCBs
- Replaced defective power cord
- Replaced "Big Blue" with "Big Black"
- Replaced wrong value fuses with correct fuses
- Adjusted monitor width, height, contrast, & brightness
- MACHINE #2
- Replaced 74LS191 at D9 (graphical issues)
- Replaced 74LS191 at P10 (thruster issues)
- Replaced 74LS191 at P9 & P10 again (thruster issues)
- Replaced 5k variable resistor for thruster
- Replaced all leg-leveler mounting plates
- Replaced leg-levelers with TITAN-25 nylon levelers
- Rebuilt G05-801 monitor
- Modified G05-802 HV shield for use with the G05-801 HV cage
- MACHINE #1
- Install cap-kit to monitor
- Refurbish coin door
- Repair bottom of cabinet
- Add back cabinet legs
- Repair cabinet around added screws
- MACHINE #2
- Install cap-kit on the ARI power supply
- Refurbish coin door
- Fix mission lighting
- Fix LEDs on panel
Page Created: 08-18-2011
Last update: 02-10-2020